16 KiB
How to create a custom Ubuntu live from scratch
This procedure shows how to create a bootable and installable Ubuntu Live (along with the automatic hardware detection and configuration) from scratch.
Prerequisites (GNU/Linux Debian/Ubuntu)
Install applications we need to build the environment.
sudo apt-get install \
    debootstrap \
    squashfs-tools \
    xorriso \
    grub-pc-bin \
    grub-efi-amd64-bin \
    mtools
mkdir $HOME/live-ubuntu-from-scratch
Bootstrap and Configure Ubuntu
-
Checkout bootstrap
sudo debootstrap \
   --arch=amd64 \
   --variant=minbase \
   bionic \
   $HOME/live-ubuntu-from-scratch/chroot \
   http://us.archive.ubuntu.com/ubuntu/
debootstrap is used to create a Debian base system from scratch, without requiring the availability of dpkg or apt. It does this by downloading .deb files from a mirror site, and carefully unpacking them into a directory which can eventually be chrooted into.
-
Configure external mount points
sudo mount --bind /dev $HOME/live-ubuntu-from-scratch/chroot/dev

sudo mount --bind /run $HOME/live-ubuntu-from-scratch/chroot/run
As we will be updating and installing packages (grub among them), these mount points are necessary inside the chroot environment, so we are able to finish the installation without errors.
Define chroot environment
A chroot on Unix operating systems is an operation that changes the apparent root directory for the current running process and its children. A program that is run in such a modified environment cannot name (and therefore normally cannot access) files outside the designated directory tree. The term "chroot" may refer to the chroot system call or the chroot wrapper program. The modified environment is called a chroot jail.
Reference: https://en.wikipedia.org/wiki/Chroot
- Access chroot environment
sudo chroot $HOME/live-ubuntu-from-scratch/chroot
-
Configure mount points, home and locale
mount none -t proc /proc

mount none -t sysfs /sys

mount none -t devpts /dev/pts

export HOME=/root

export LC_ALL=C
These mount points are necessary inside the chroot environment, so we are able to finish the installation without errors.
-
Set a custom hostname
echo "ubuntu-fs-live" > /etc/hostname -
Configure apt sources.list
cat <<EOF > /etc/apt/sources.list deb http://us.archive.ubuntu.com/ubuntu/ bionic main restricted universe multiverse deb-src http://us.archive.ubuntu.com/ubuntu/ bionic main restricted universe multiverse deb http://us.archive.ubuntu.com/ubuntu/ bionic-security main restricted universe multiverse deb-src http://us.archive.ubuntu.com/ubuntu/ bionic-security main restricted universe multiverse deb http://us.archive.ubuntu.com/ubuntu/ bionic-updates main restricted universe multiverse deb-src http://us.archive.ubuntu.com/ubuntu/ bionic-updates main restricted universe multiverse EOF -
Update indexes packages
apt-get update -
Install systemd
apt-get install -y systemd-sysvsystemd is a system and service manager for Linux. It provides aggressive parallelization capabilities, uses socket and D-Bus activation for starting services, offers on-demand starting of daemons, keeps track of processes using Linux control groups, maintains mount and automount points and implements an elaborate transactional dependency-based service control logic.
-
Configure machine-id and divert
dbus-uuidgen > /etc/machine-id

ln -fs /etc/machine-id /var/lib/dbus/machine-id
The
/etc/machine-idfile contains the unique machine ID of the local system that is set during installation or boot. The machine ID is a single newline-terminated, hexadecimal, 32-character, lowercase ID. When decoded from hexadecimal, this corresponds to a 16-byte/128-bit value. This ID may not be all zeros.dpkg-divert --local --rename --add /sbin/initctl ln -s /bin/true /sbin/initctldpkg-divert is the utility used to set up and update the list of diversions.
-
Install packages needed for Live System
apt-get install -y \
    ubuntu-standard \
    casper \
    lupin-casper \
    discover \
    laptop-detect \
    os-prober \
    network-manager \
    resolvconf \
    net-tools \
    wireless-tools \
    wpagui \
    locales \
    linux-generic
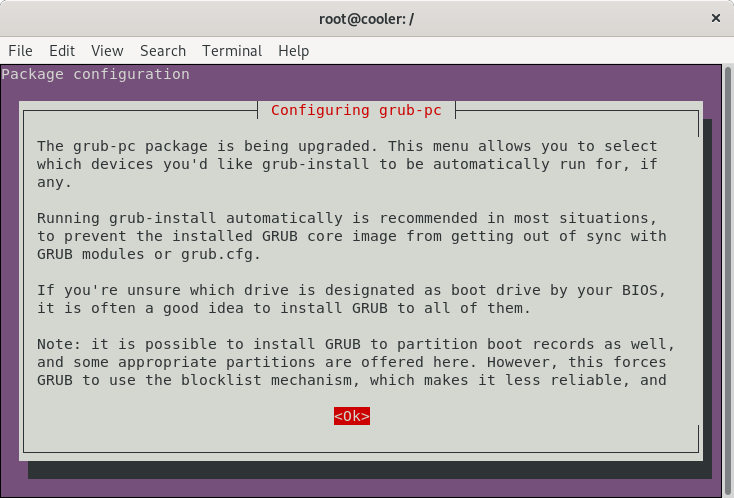
The next steps will appear, as a result of the packages that will be installed from the previous step, this will happen without anything having to be informed or executed.
-
Configure grub
-
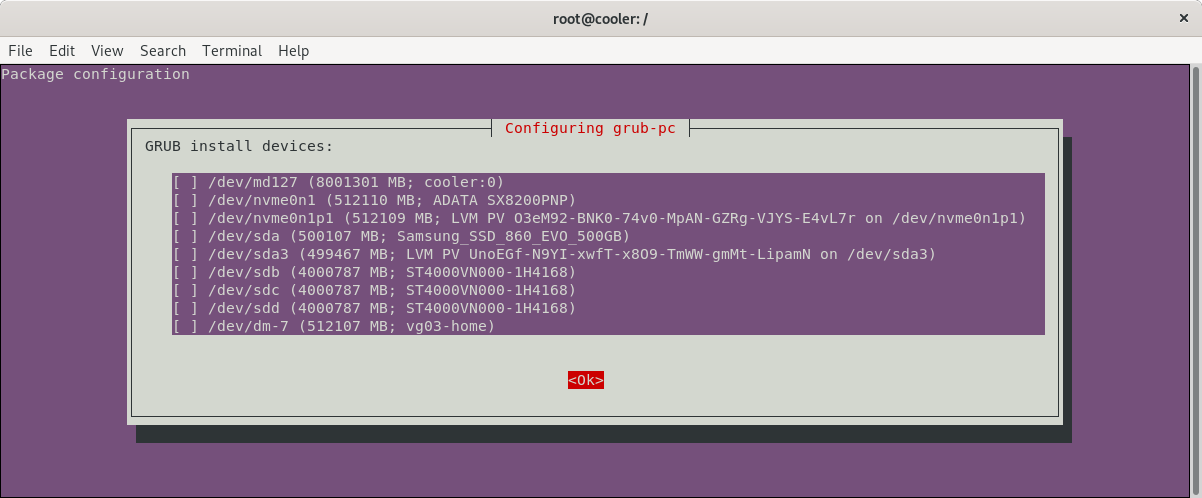
Don’t select any options
-
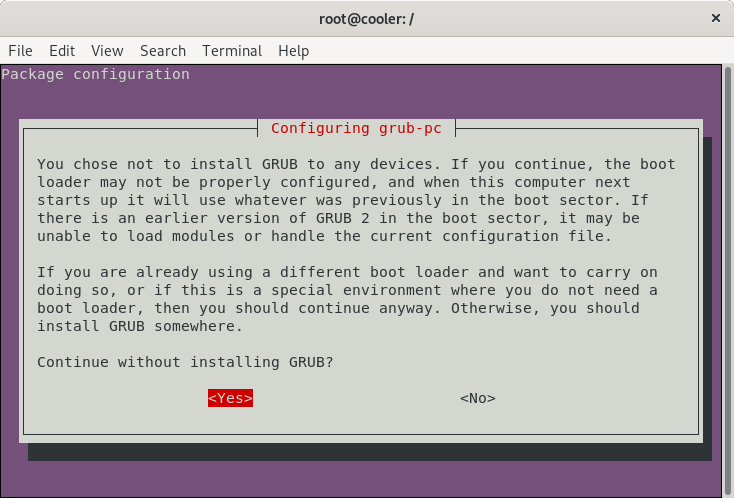
Only confirm “Yes”
-
-
Graphical installer
apt-get install -y \
    ubiquity \
    ubiquity-casper \
    ubiquity-frontend-gtk \
    ubiquity-slideshow-ubuntu \
    ubiquity-ubuntu-artwork
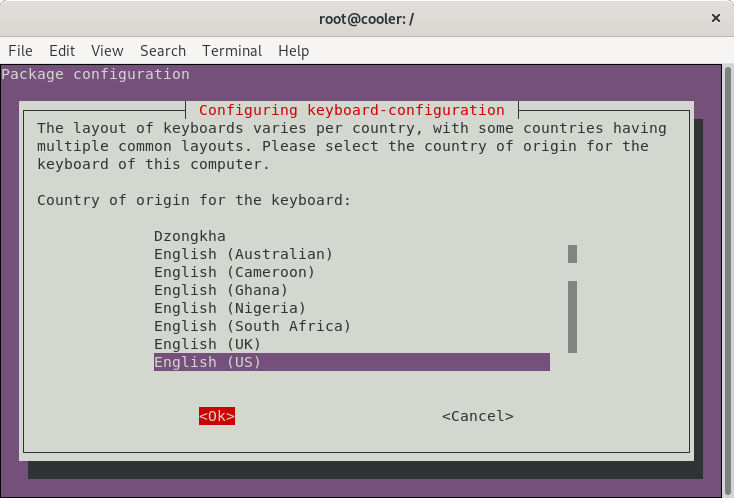
The next steps will appear, as a result of the packages that will be installed from the previous step, this will happen without anything having to be informed or executed.
-
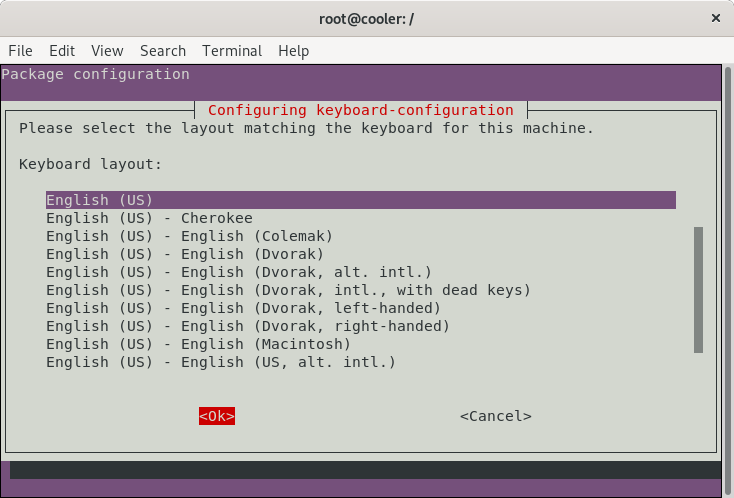
Configure keyboard
-
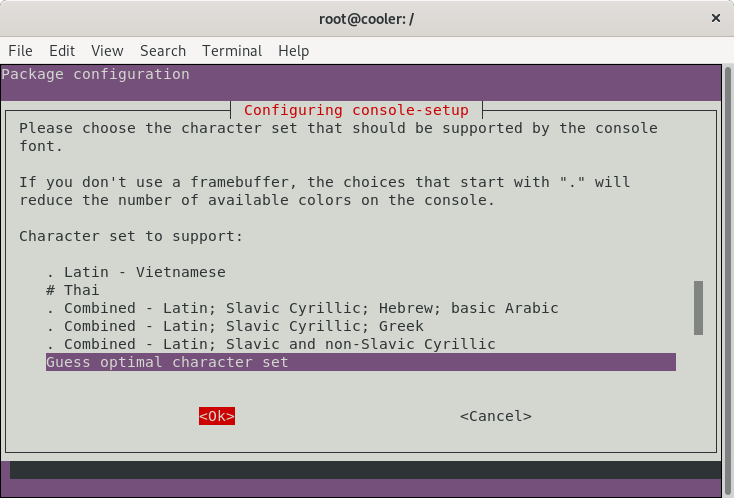
Console setup
-
-
Install window manager
apt-get install -y \ plymouth-theme-ubuntu-logo \ ubuntu-gnome-desktop \ ubuntu-gnome-wallpapers -
Install useful applications
apt-get install -y \ clamav-daemon \ terminator \ apt-transport-https \ curl \ vim \ nano \ less -
Install Visual Studio Code
-
Download and install the key
curl https://packages.microsoft.com/keys/microsoft.asc | gpg --dearmor > microsoft.gpg install -o root -g root -m 644 microsoft.gpg /etc/apt/trusted.gpg.d/ echo "deb [arch=amd64] https://packages.microsoft.com/repos/vscode stable main" > /etc/apt/sources.list.d/vscode.list rm microsoft.gpg -
Then update the package cache and install the package using
apt-get update

apt-get install -y code
-
-
Install Google Chrome
-
Download and install the key
wget -q -O - https://dl-ssl.google.com/linux/linux_signing_key.pub | sudo apt-key add - echo "deb http://dl.google.com/linux/chrome/deb/ stable main" > /etc/apt/sources.list.d/google-chrome.list -
Then update the package cache and install the package using
apt-get update

apt-get install google-chrome-stable
-
-
Install Java JDK 8
apt-get install -y \ openjdk-8-jdk \ openjdk-8-jre -
Remove unused applications
apt-get purge -y \ transmission-gtk \ transmission-common \ gnome-mahjongg \ gnome-mines \ gnome-sudoku \ aisleriot \ hitori -
Remove unused packages
apt-get autoremove -y -
Reconfigure packages
-
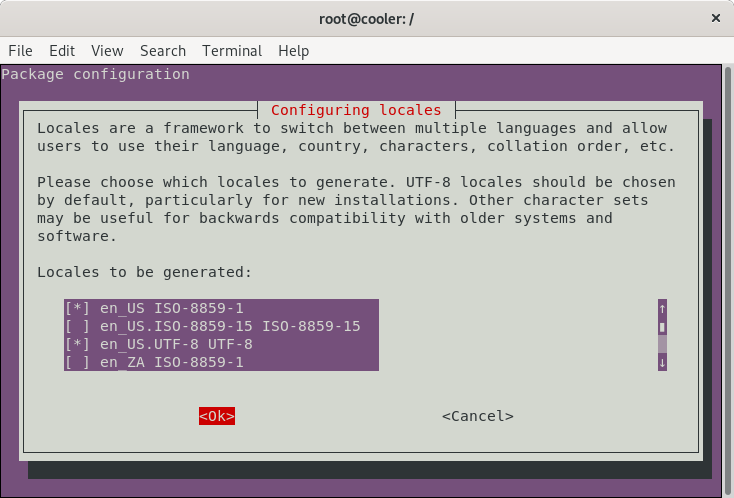
Generate locales
dpkg-reconfigure locales-
Select locales
-
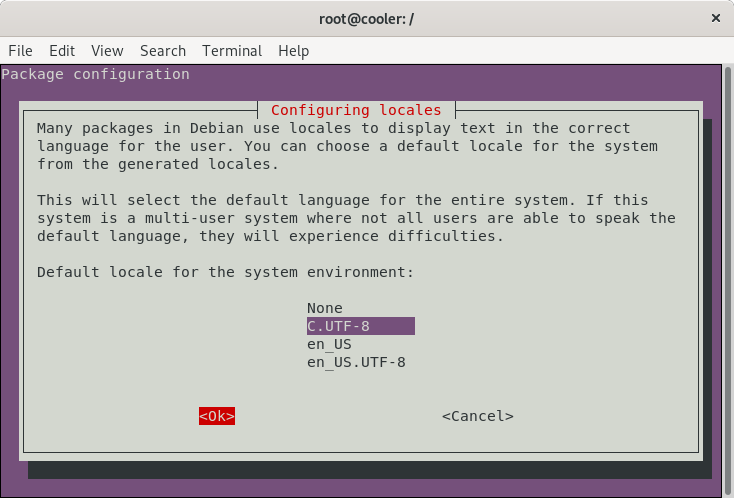
Select default locale
-
-
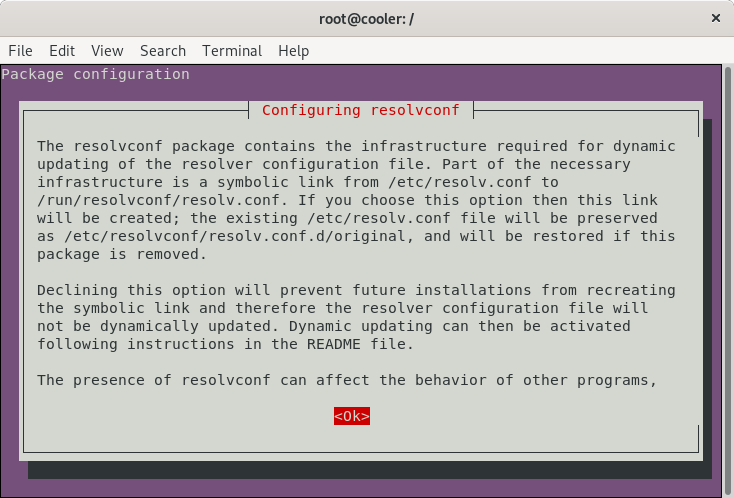
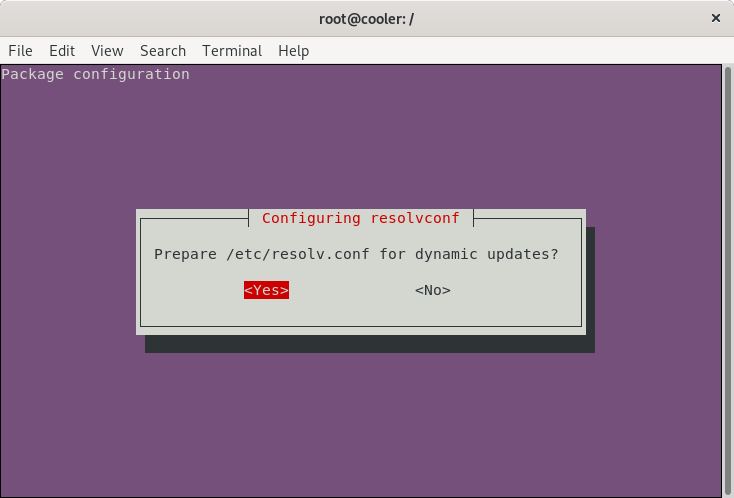
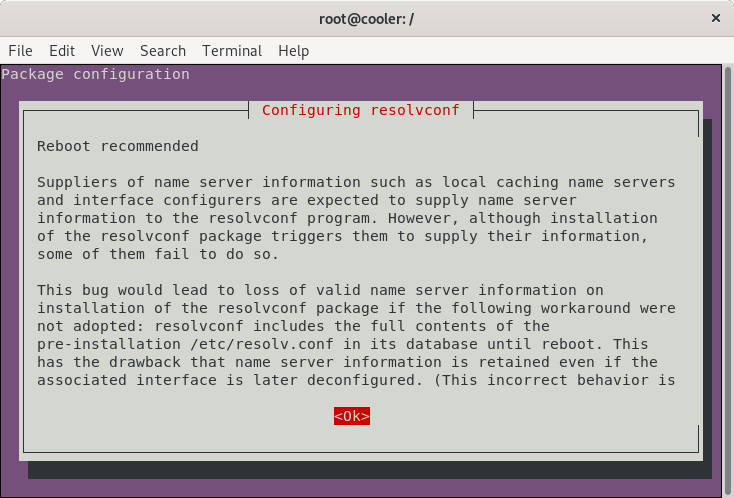
Reconfigure resolvconf
dpkg-reconfigure resolvconf-
Confirm changes
-
-
Configure network-manager
cat <<EOF > /etc/NetworkManager/NetworkManager.conf [main] rc-manager=resolvconf plugins=ifupdown,keyfile dns=dnsmasq [ifupdown] managed=false EOF -
Reconfigure network-manager
dpkg-reconfigure network-manager
-
-
Cleanup the chroot environment
-
If you installed software, be sure to run
truncate -s 0 /etc/machine-id -
Remove the diversion
rm /sbin/initctl dpkg-divert --rename --remove /sbin/initctl -
Clean up
apt-get clean

rm -rf /tmp/* ~/.bash_history

umount /proc

umount /sys

umount /dev/pts

export HISTSIZE=0

exit
-
Unbind mount points
sudo umount $HOME/live-ubuntu-from-scratch/chroot/dev

sudo umount $HOME/live-ubuntu-from-scratch/chroot/run
Create the CD image directory and populate it
-
Access build directory
cd $HOME/live-ubuntu-from-scratch -
Create directories
mkdir -p image/{casper,isolinux,install} -
Copy kernel images
sudo cp chroot/boot/vmlinuz-**-**-generic image/casper/vmlinuz sudo cp chroot/boot/initrd.img-**-**-generic image/casper/initrd -
Copy memtest86+ binary (BIOS)
sudo cp chroot/boot/memtest86+.bin image/install/memtest86+ -
Extract memtest86 binary (UEFI)
wget --progress=dot https://www.memtest86.com/downloads/memtest86-usb.zip -O image/install/memtest86-usb.zip

unzip -p image/install/memtest86-usb.zip memtest86-usb.img > image/install/memtest86

rm image/install/memtest86-usb.zip
Grub configuration
-
Access build directory
cd $HOME/live-ubuntu-from-scratch -
Create base point access file to grub
touch image/ubuntu -
Create image/isolinux/grub.cfg
cat <<EOF > image/isolinux/grub.cfg

search --set=root --file /ubuntu

insmod all_video

set default="0"
set timeout=30

menuentry "Try Ubuntu without installing" {
   linux /casper/vmlinuz boot=casper quiet splash ---
   initrd /casper/initrd
}

menuentry "Install Ubuntu" {
   linux /casper/vmlinuz boot=casper only-ubiquity quiet splash ---
   initrd /casper/initrd
}

menuentry "Check disc for defects" {
   linux /casper/vmlinuz boot=casper integrity-check quiet splash ---
   initrd /casper/initrd
}

menuentry "Test memory Memtest86+ (BIOS)" {
   linux16 /install/memtest86+
}

menuentry "Test memory Memtest86 (UEFI, long load time)" {
   insmod part_gpt
   insmod search_fs_uuid
   insmod chain
   loopback loop /install/memtest86
   chainloader (loop,gpt1)/efi/boot/BOOTX64.efi
}
EOF
Create manifest
In the next steps the creation of the manifest is important because it tells us which version of each package installed in the Live version and which packages will be removed or maintained in the version that will be installed (persisted in the hard drive).
-
Access build directory
cd $HOME/live-ubuntu-from-scratch -
Generate manifest
sudo chroot chroot dpkg-query -W --showformat='${Package} ${Version}\n' | sudo tee image/casper/filesystem.manifest

sudo cp -v image/casper/filesystem.manifest image/casper/filesystem.manifest-desktop

sudo sed -i '/ubiquity/d' image/casper/filesystem.manifest-desktop

sudo sed -i '/casper/d' image/casper/filesystem.manifest-desktop

sudo sed -i '/discover/d' image/casper/filesystem.manifest-desktop

sudo sed -i '/laptop-detect/d' image/casper/filesystem.manifest-desktop

sudo sed -i '/os-prober/d' image/casper/filesystem.manifest-desktop
Compress the chroot
After everything has been installed and preconfigured in the chrooted environment, we need to generate an image of everything that was done by following the next steps.
-
Access build directory
cd $HOME/live-ubuntu-from-scratch -
Create squashfs
sudo mksquashfs chroot image/casper/filesystem.squashfsSquashfs is a highly compressed read-only filesystem for Linux. It uses zlib compression to compress both files, inodes and directories. Inodes in the system are very small and all blocks are packed to minimize data overhead. Block sizes greater than 4K are supported up to a maximum of 64K. Squashfs is intended for general read-only filesystem use, for archival use (i.e. in cases where a .tar.gz file may be used), and in constrained block device/memory systems (e.g. embedded systems) where low overhead is needed.
-
Write the filesystem.size
printf $(sudo du -sx --block-size=1 chroot | cut -f1) > image/casper/filesystem.size
Create diskdefines
README file often found on Linux LiveCD installer discs, such as an Ubuntu Linux installation CD; typically named “README.diskdefines” and may be referenced during installation.
-
Access build directory
cd $HOME/live-ubuntu-from-scratch -
Create file image/README.diskdefines
cat <<EOF > image/README.diskdefines
#define DISKNAME  Ubuntu from scratch
#define TYPE  binary
#define TYPEbinary  1
#define ARCH  amd64
#define ARCHamd64  1
#define DISKNUM  1
#define DISKNUM1  1
#define TOTALNUM  0
#define TOTALNUM0  1
EOF
Create ISO Image for a LiveCD (BIOS + UEFI)
-
Access image directory
cd $HOME/live-ubuntu-from-scratch/image -
Create a grub UEFI image
grub-mkstandalone \ --format=x86_64-efi \ --output=isolinux/bootx64.efi \ --locales="" \ --fonts="" \ "boot/grub/grub.cfg=isolinux/grub.cfg" -
Create a FAT16 UEFI boot disk image containing the EFI bootloader
( cd isolinux && \ dd if=/dev/zero of=efiboot.img bs=1M count=10 && \ sudo mkfs.vfat efiboot.img && \ mmd -i efiboot.img efi efi/boot && \ mcopy -i efiboot.img ./bootx64.efi ::efi/boot/ ) -
Create a grub BIOS image
grub-mkstandalone \ --format=i386-pc \ --output=isolinux/core.img \ --install-modules="linux16 linux normal iso9660 biosdisk memdisk search tar ls" \ --modules="linux16 linux normal iso9660 biosdisk search" \ --locales="" \ --fonts="" \ "boot/grub/grub.cfg=isolinux/grub.cfg" -
Combine a bootable Grub cdboot.img
cat /usr/lib/grub/i386-pc/cdboot.img isolinux/core.img > isolinux/bios.img -
Generate md5sum.txt
sudo /bin/bash -c "(find . -type f -print0 | xargs -0 md5sum | grep -v "\./md5sum.txt" > md5sum.txt)" -
Create iso from the image directory using the command-line
sudo xorriso \
   -as mkisofs \
   -iso-level 3 \
   -full-iso9660-filenames \
   -volid "Ubuntu from scratch" \
   -eltorito-boot boot/grub/bios.img \
   -no-emul-boot \
   -boot-load-size 4 \
   -boot-info-table \
   --eltorito-catalog boot/grub/boot.cat \
   --grub2-boot-info \
   --grub2-mbr /usr/lib/grub/i386-pc/boot_hybrid.img \
   -eltorito-alt-boot \
   -e EFI/efiboot.img \
   -no-emul-boot \
   -append_partition 2 0xef isolinux/efiboot.img \
   -output "../ubuntu-from-scratch.iso" \
   -graft-points \
      "." \
      /boot/grub/bios.img=isolinux/bios.img \
      /EFI/efiboot.img=isolinux/efiboot.img
Make a bootable USB image
It is simple and easy, using "dd"
sudo dd if=ubuntu-from-scratch.iso of=<device> bs=4M